

Quick guide to creating a contact group
Use a contact group also called a distribution list to send an email to multiple contacts e.g. a committee, or even just a group of friends, without having to add individual names every time want to email them. Sending a message to more than one person via email is a quick method of getting your information across. You only have to type the content once, so that the minutes of your meeting or your amazing selfie can go to everyone at the press of a button. It’s always a good idea to make sure everyone on your list is happy to receive email from you. Some mail providers can detect that an email has come from a distribution list and if your recipients are not expecting your message, your important information may end up in a spam folder. Outlook has made this easy to configure and once you’ve setup the list your ready to go. I’ve outlined the basic steps below and the pictorial guide will show you exactly where to find everything you need.
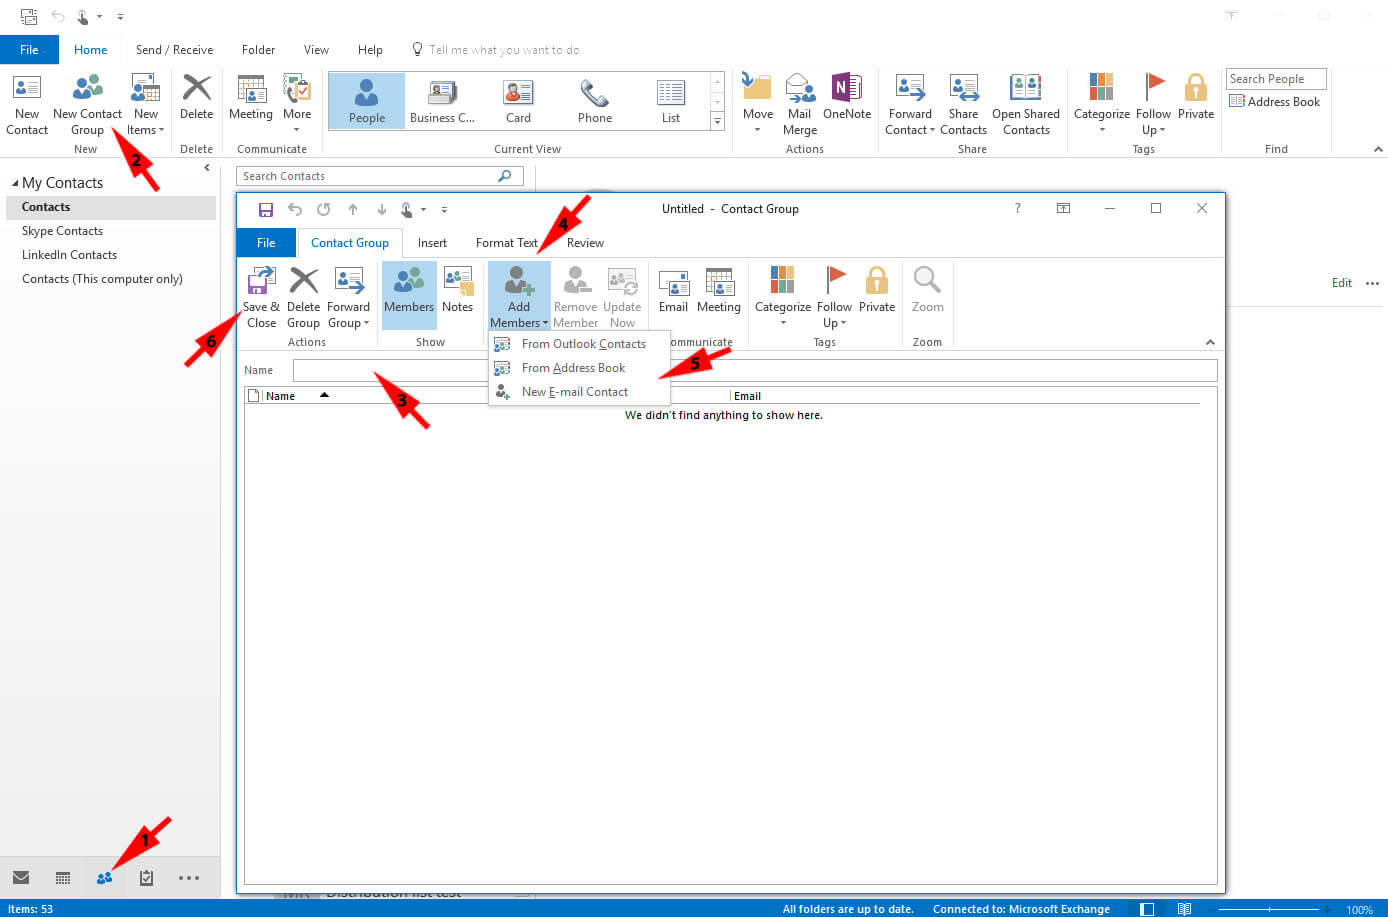
- Once you have opened Outlook, select the people icon at the bottom left hand side of the mail application window
- Choose New Contact Group from the tool ribbon at the top (please note this will open a new window pane)
- In the new pane give your new Distribution/Contact List a name that makes sense so that you can find it later e.g. Neighbourhood watch committee.
- Chose add members from the toolbar in the new window.
- Select Add Members and either chose contacts from a list or manually add a contact.
- Save and close when finished.
Further reading
Send an email message to a distribution list
How many names can I include in a distribution list?
If you are using Outlook to send newsletters to your customers both old and new make sure you understand your responsibilities with respect to data protection
